3 Ways to Remove Scratches from a Car - wikiHow
Painting to Fix Deep Scratches 1. Wash and dry the car thoroughly. If your car is dirty during scratch repair, that dirt could create more scratches. 2. Sand the scratched area to strip away the top layers of paint. Wrap 2000-grit wet/dry sandpaper around a sanding pad 3. Rinse and dry the area. Last Updated: April 30, 2020 References ApprovedThis article was co-authored by Chad Zani. Chad Zani is the Director of Franchising at Detail Garage, an automotive detailing company with locations around the U.S. and Sweden. Chad is based in the Los Angeles, California area and uses his passion for auto detailing to teach others how to do so as he grows his company nationwide. There are 15 references cited in this article, which can be found at the bottom of the page. wikiHow marks an article as reader-approved once it receives enough positive feedback. In this case, 92% of readers who voted found the article helpful, earning it our reader-approved status. This article has been viewed 1,799,880 times.Scratches in car paint can be caused by a variety of things. Car accidents, vandalism, poor parking, and other parking lot mishaps are all common causes for a scratch or 2 on your perfect paint job. While scratches do detract from the appearance of your car, paying a body shop for a new coat of paint or even a small touch-up can be costly. You can try buffing out surface scratches with toothpaste, using a scratch removal product for small scratches, or sanding and repainting the area if the scratch is deep.
Chad ZaniScratch repair pens are best for light scratches in the car's clear coat. However, if the scratch is so deep it's into or past the paint, you'll probably need to go to a body shop.
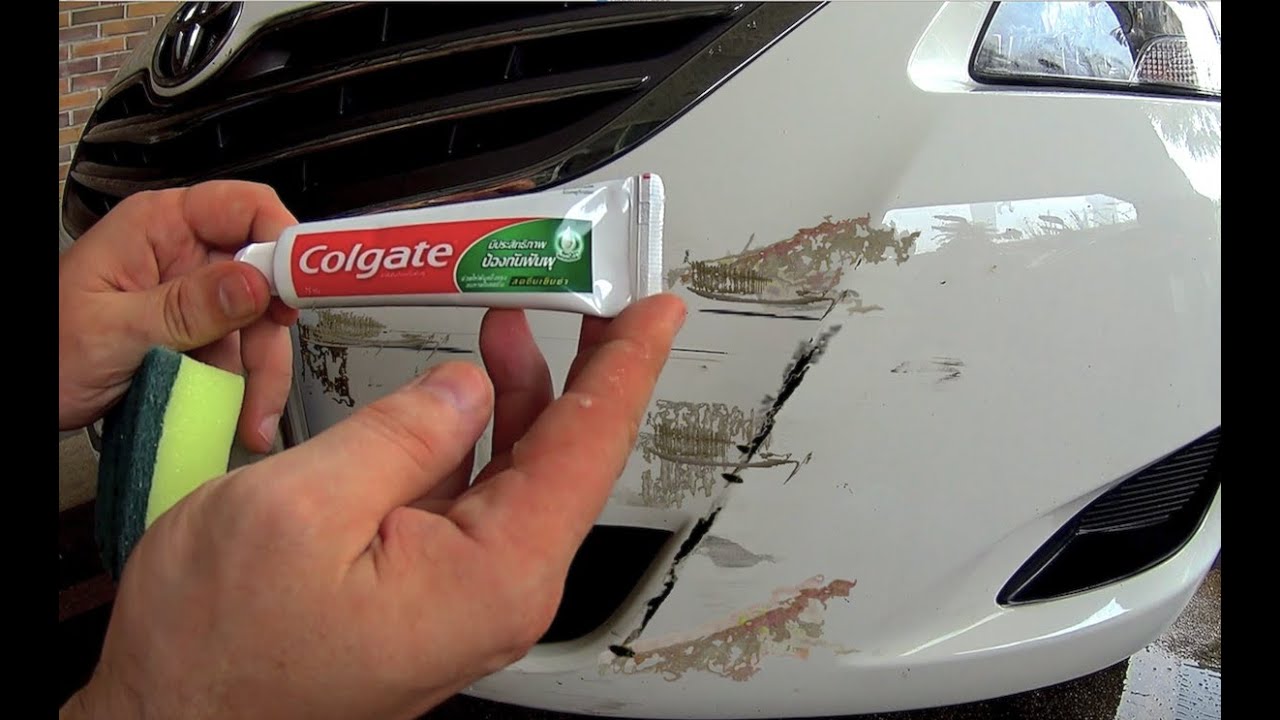
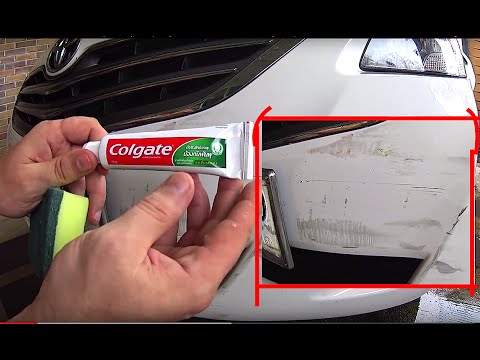
How toHow toHow toHow toHow toHow toHow toHow toHow toHow toHow toHow toHow toHow toTo remove a surface-level scratch from your car, try using non-gel toothpaste. First, spread a thick layer of the toothpaste over the scratch with a cloth. Then, use a clean toothbrush to work the toothpaste into the scratch. When you've thoroughly brushed the area, rinse off the toothpaste, and the scratch should be gone. For deeper scratches, try using sandpaper. First, sand the scratched area with 2000-grit sandpaper until the surface of your car feels rough. Then, rinse off the area and wipe it dry with a cloth. Next, spray the area you sanded with auto-body primer, and let it dry for 20 to 30 minutes. Once it’s dry, spray the area with auto-body paint that matches the color of your car. Finally, seal the paint with wax or polish. If nothing else is working, try using a car scratch remover kit. For more details about how to use each of these methods, keep reading!
Pat GarverickSep 9, 2016Charlie SmitheDec 4, 2016Chester AndersonJun 5, 2017AnonymousNov 4, 2016AnonymousFeb 21, 2017Abdus Samad KhanMay 27, 2017AnonymousApr 6, 2018Graham SmithApr 28, 2017Pat GarverickSep 9, 2016Charlie SmitheDec 4, 2016Chester AndersonJun 5, 2017AnonymousNov 4, 2016AnonymousFeb 21, 2017How toHow toHow toHow toFollow UsOrganize your home like an expertWe know ads can be annoying, but they’re what allow us to make all of wikiHow available for free. Please help us continue to provide you with our trusted how-to guides and videos for free by whitelisting wikiHow on your ad blocker. If you really can’t stand to see another ad again, then please consider supporting our work with a contribution to wikiHow.
Car Scratch Remover & Repair 2019 - How to Fix Car Scratches
How To Fix a Car Paint Scratch Step 1: Abrasion. It feels very wrong to lean into your fender with a folded piece of 180-grit, but that's what you have Step 2: Priming. On to the sprays. First is the black-tinted sandable primer. It fills in the sandpaper scores with Step 3: Coating. Primer Gear-obsessed editors choose every product we review. We may earn commission if you buy from a link. How we test gear.Scratches, chips and other imperfections are just about unavoidable, but a careful repair job can be almost totally invisible. Here's how to fix a paint scratch on your car, step by step.Options for paint repair range from simple tinted waxes and As-Seen-On-TV miracle pens to multistage treatments matched to your car's exact color. As someone who's capable with a wrench, I went with the latter and tested Automotive Touchup's kit on my pockmarked 1993 Ford Bronco. It costs about $50 depending on which supplies you need, compared to $5,000 for a professional all-over repainting. This collection of aerosol cans and sandpaper is as close as you can get to an appointment at the paint booth. Here's how it works, and whether it's worth it.
Unless the car you're repairing is over 20 years old or was custom-painted, the paint is almost certainly a clear-coated catalyzed enamel. Artificially hardened by toxic chemicals, it's stable within hours of factory application.
On the other hand, the paint you're applying, whether it's primer, color or clear, is a lacquer. Lacquers dry because the solvent evaporates, leaving the solids behind. While they may feel hard and be sandable within a few minutes, they will continue to shrink for a while. Allow lacquers to dry at least overnight so they can shrink before you add another coat. If you need multiple coats to build up the paint film to full thickness for a repair, one coat a day is best. Of course, be safe. The amounts of solvents used are small, but work in a well-ventilated area. Make sure to degrease the area with solvent before starting.
Somewhere on your car should be the factory-paint code, probably on a sticker or metal plaque under the hood or in the doorsill. This will help a great deal in finding the correct touchup.
If you can't match the color in the display of touchup paints at the auto parts store, your next, albeit expensive, step is the parts counter at the car dealer, at least if you have a car that's less than 10 to 15 years old.
If you're really stumped, an auto paint dealer can custom-mix you a pint; take in a sample, like the gas cap or a mirror. I've also gotten great matches from expresspaint.com and from their motorcycle counterpart, color-rite.com, where you can mail-order touchup pens and bottles, aerosol cans or quarts or larger cans of matched paint.
Minor scratches, ones that don't go through the clear coat into the color, or areas of low gloss or orange-peel texture can often simply be polished out with compound. Yes, this removes some of the clear coat, so polish the minimum area necessary or you'll have to respray some of that protective top layer. Thoroughly clean the panel after you're done to remove the abrasive compound.
You'll need to get some matching paint. This same procedure can be used to repair primer-coat scratches by brushing in a layer of primer first, then sanding the overrun until it covers only the bottom of the scratch. Don't skip that step: You'll have poor adhesion and/or rust.
As with any serious touch-up kit, there are a lot of materials. The box for my black Bronco (color code M1724A) includes prep solvent, rubbing compound, sandpaper of various grits, rubber gloves, a tack rag to pick up dust, pretaped plastic to block messy overspray (like blue painter's tape for your car), and cans of primer, base coat, and clear coat.
It all suggests a lot of work, which turns out to be accurate. I watch one of Automotive Touchup's how-to videos and print out the instructions. I bring everything outside, then pick the most unsightly scratches and a rust spot on the hood. I wipe them with the solvent and rag, then tape a perimeter to protect my cherished Eddie Bauer fender badge.
It feels very wrong to lean into your fender with a folded piece of 180-grit, but that's what you have to do. You make the scratch much, much worse before making it better. I get big, horrible white blotches on the Bronco's fender, door, hood, and rear quarter-panel. But it's cathartic, in a way, to grind down to bare metal in the name of making your car beautiful again.
On to the sprays. First is the black-tinted sandable primer. It fills in the sandpaper scores with something that resembles the original black, instantly reassuring me.I add three coats to the metal in total, waiting five to ten minutes for each to dry before applying the next. This is a running theme of touch-up work: Spend two minutes painting and then ten minutes waiting to do another two minutes of painting.
In this manner, a man could, hypothetically, consume several Founders All Day IPAs in the course of a job.Primer gives way to base coat, which means more aerosol cans. Each application seals in the pigment and protective layers beneath. Between sprays, you sand with ever-finer paper.By the end, you're wet-sanding with 1,500-grit, which feels smoother than a sheet of construction paper. At each interval, you get closer to a factory-finish gloss. The last clear coat finalizes your work with a shiny shell.
The clear coat dries overnight, and I hit my handiwork with the rubbing compound to bring out the shine. And shine it does, which brings me to an unexpected dilemma: The touch-up work looks better than the original paint.
Inevitably, nine layers of new paint look better than decades-old factory black. For the job overall, I say, success. In fact, too much success. The instructions say an all-over wax will help it blend. Final step: Give it hell with the orbital buffer and hope it blends.
Of course, if you're not going to prep and paint a whole section of your car, you can try a scratch removal product like Meguiar's ScratchX 2.0.Check out two sections of thoroughly scratched Ford tailgate. The right was treated with Scratch X, the left is how the whole thing looked before. It can't address the deeper chips and scratches, but the light stuff is eradicated and returned to a glossy black.
To fix a deep scratch without delving into a full repaint, you can also try a paint pen. This corner of my Bronco looks like it was buffed with an angle grinder, so I bought a Dupli-Color Paint Pen to try to improve the situation.
The paint pen comes with an abrasive tip so you can rough up the surface to accept paint. Depending on your car, you might be able to match your exact paint code. But I figured with 26-year old paint, it wasn't an exact match of itself anyway, so I went with Universal Black.
My brushwork might leave something to be desired (you can use either a pen tip for finer scratches, or a brush for big gouges) but this section looks 100 percent better than it did before. Give it a couple coats and some wax and it'll definitely improve the look—and protect the metal.
3 Ways to Repair a Deep Scratch on Car - wikiHow
How to Repair a Deep Scratch on Car Method 1of 3:Buffing out Moderate Scratches. Wash and dry the damaged area. Before you attempt to repair a scratch in Method 2of 3:Filling Deep Gouges. Clean the scratch with rubbing alcohol to remove dirt or wax. Wet a soft cloth or Method 3of Last Updated: November 28, 2019 ReferencesThis article was co-authored by our trained team of editors and researchers who validated it for accuracy and comprehensiveness. wikiHow's Content Management Team carefully monitors the work from our editorial staff to ensure that each article is backed by trusted research and meets our high quality standards. There are 21 references cited in this article, which can be found at the bottom of the page. This article has been viewed 58,317 times. Learn moreFinding a bad scratch on your car can be frustrating, but fear not—repairing even the worst scratches can be a fairly simple fix, provided you have the right tools. Depending on just how deep the scratch is, you may be able to buff it out by hand using a scratch repair kit. If that doesn’t do the trick, fill in the damaged area with glazing putty and apply a little touch up paint to hide it from sight.
Tip: To save time, you can can also wipe the scratch with rubbing alcohol to remove dust and dirt particles.Tip: Wrapping your detailing towel or cloth around a rectangular backing block can make it more comfortable to handle for time-consuming jobs.Tip: To find an exact match for your car’s paint color, refer to the paint code listed on the label inside your driver’s side door. If you don’t see it there, talk to the original dealer.[15] X Research source
Every day at wikiHow, we work hard to give you access to instructions and information that will help you live a better life, whether it's keeping you safer, healthier, or improving your well-being. Amid the current public health and economic crises, when the world is shifting dramatically and we are all learning and adapting to changes in daily life, people need wikiHow more than ever. Your support helps wikiHow to create more in-depth illustrated articles and videos and to share our trusted brand of instructional content with millions of people all over the world. Please consider making a contribution to wikiHow today.
How toHow toHow toHow toHow toHow toHow toHow toHow toHow toHow toHow toHow toHow toHow toHow toHow toHow toFollow UsDon’t miss out! Sign up forwikiHow’s newsletterWe know ads can be annoying, but they’re what allow us to make all of wikiHow available for free. Please help us continue to provide you with our trusted how-to guides and videos for free by whitelisting wikiHow on your ad blocker. If you really can’t stand to see another ad again, then please consider supporting our work with a contribution to wikiHow.
3 Easy Ways to Remove Scratches from a Car | Family Handyman
How to Remove Deep Car Scratches 1. Sand the scratched area 2. Home Automotive DIY Car PaintEvery editorial product is independently selected, though we may be compensated or receive an affiliate commission if you buy something through our links.On This PageIt’s no secret that car paint scratches easily. Ever set a grocery bag on your roof, hood or trunk lid and then slide it off? You know the result: Instant scratches.But don’t freak out. You might be able to remove these minor paint scratches yourself in less than an hour and for less than $30. To see if your scratches qualify for this DIY repair, run your fingernail across the scratch. If your nail glides across the scratch without catching in it, it’s a minor scratch that will polish out. But if the scratch catches your fingernail, it’s a job for a body shop.
If your scratch qualifies, pick up 3,000-grit sandpaper, rubbing and polishing compound, and polishing pads. You’ll also need a portable drill or dual action (DA) polisher unit. You can buy most of the components off-the-shelf at any auto parts store. Or you can buy a complete scratch removal kit.
You may have heard about the toothpaste method for removing scratches. This only works for really shallow scratches. Toothpaste is just as abrasive as 3,000-grit sandpaper and works as a polishing compound. If you don’t have the necessary tools and materials, this is a great option to remove small scratches.
Wet the scratch and sandpaper and lightly sand until the finish looks dull and the scratch is no longer obvious. Then clean the surface with a microfiber towel.Squirt rubbing compound onto the polishing pad and spread it around with the pad. Then run the polisher or drill at 1,200 rpm until you get a light haze. Follow up with polishing compound to restore the shine.
Small scratches are just big enough to stop your fingernail in our test. These scratches have dug down into the base coat. But don’t worry, you can still get them out using basic tools and materials. Remember to wash your car before attempting to remove the scratch. See the simple process below.
Dab a quarter-sized bead onto the scrubbing pad and apply directly to the scratch. Work the product into the scratched area, as well as the surrounding area.Wipe away any residue with a microfiber towel.It’s safe to do this method a couple times. You may see a slight difference in the scratch after trying it once but it hasn’t gone away completely. Give it a couple more gos and the scratch will be harder and harder to see.
Deep paint scratches are much harder to handle but can still be eradicated with some patience. If you can see down to the metal panel, then this is the method for you. As with all of these methods, wash your car before attempting to remove a scratch.
Sand with 2,000-grit sandpaper until you reach your car’s metal panel. Always sand in the direction of the scratch; there is no need to make more scratches.Mask off the area with paper and masking tape to prevent spreading paint/primer to any other area. Spray automotive primer onto the area and let it dry. Next, spray the area with your car’s matching paint. It can be difficult to find the correct paint shade, but your manufacturer’s specs will give you the code that matches your paint. Lay a heavy amount of paint onto the area and let dry.
Make the newly-painted area match the rest of your car by polishing the spot. Lay a quarter-sized bead onto a polishing pad or microfiber towel and rub in a circular motion until all the polish is removed.
Our BrandsWe are no longer supporting IE (Internet Explorer) as we strive to provide site experiences for browsers that support new web standards and security practices.We recommend our users to update the browser.
5 Hacks to Rid Your Car of Deep Scratches - Carbibles
It should be noted that ordinary car scratch repair kits are primarily intended for light to moderate scratches where only the clear coat is damaged and the base coat is not really affected at all. Nevertheless, since the kit already comes with a scratch filler, you might as well use it to temporarily ‘fill’ the deep scratch. You parked your car outside your garage overnight. The following morning you get the surprise of your life when you noticed a long streak of line across your car’s body. You know that some cruel dude vented his ire on your car by running his keys around the body of your ride. You’re now left with a deep scratch that will really cost you a lot to repair and get fixed. The main issue with such types of scratches is that they are so deep that the damage already extends well beyond the clear coat and into the primer. Don’t worry as we’ve got 5 hacks to rid your car’s finish of deep scratches. Take note however that these solutions are only temporary and that more permanent ones are available from your neighborhood car body repair shop.The good thing about today’s automotive care technologies is that there are now products that can help you do almost anything in an instant. As far as deep scratches go, there may be a few car scratch removers in the market that can help you out. It should be noted that ordinary car scratch repair kits are primarily intended for light to moderate scratches where only the clear coat is damaged and the base coat is not really affected at all. Nevertheless, since the kit already comes with a scratch filler, you might as well use it to temporarily ‘fill’ the deep scratch. As we have said, these solutions are not permanent yet they should help you reduce the severity of the problem until such time that you have the means for a more permanent solution vis-à-vis a thorough body work.
Related Post: Best Car Body FillersThis is one hack that will have you raising your eyebrows. We know that toothpastes are actually recommended in the removal of scratch marks on DVDs and CDs as well as the screens of laptops, smartphones, and tablets. Its scratch-removing abilities are closely tied to its abrasive properties. It is like gentler kind of sandpaper that you can use to smoothen a certain surface. That being said, we are pretty confident the toothpaste will not be able to really smoothen the deep scratch on your car. What it will do, however, is that it will fill the space with the paste allowing it to become flush with the surface, making the scratch less noticeable. Take note we said less noticeable. This should get you well on the road until you’re ready about giving your car a really good professional scratch removal job.
Related Post: Best Car DVD PlayersIf the deep scratch runs the entire length of your car, this trick might not be the best solution since you’re talking about covering it up with an adhesive tape. The idea is to cover up the scratch with a duct tape that has exactly the same color as your car’s body paint.
Today’s duct tapes already come in various colors so it should be fairly easy to choose one that will fit the color of your car. Just make sure to apply the duct tape as evenly as possible without creating any crease lines or other potentially-distracting lines. At least this will buy you some time before you can gather all of your resources for a really nice paint job on your car.
Sometimes all you need is a little touch-up paint or even spray paint. For most folks, touch-up paint is a lot easier to use because of greater control over the pen-like device. The downside of such systems is that they tend to work best on lighter to more moderate scratches. But since we’re talking about temporary solutions here, then you can always give it a try. There are also those who prefer using spray paints instead. This is an excellent choice if you’re talking about an unusually large area to ‘cover’ such as multiple scratches.
Covering these with touch-up paint will require intense concentration and focus. Now the key to using any of these two kinds of paint is to use the right color that matches exactly to the color on your car. It is also important to do some prep work on the scratch such as cleaning it thoroughly and sanding it with fine-grit sandpaper. Only then can you apply either the color spray or touch-up paint. Don’t forget to finish it with a clear coat before finally giving it a wax.
For the more artistic motorist, the deep scratch can actually be turned into some form of an artwork. For instance, the scratch marks can be layered with colored decals, trims, or stickers and positioned in such a way that they become a latticework. The stickers or decorative trims can effectively mask the deep scratch or these can be positioned in such a way that they direct the eyes away from the scratch so that people will not really notice it unless they try hard enough to look for it. The whole idea is to crowd the scratch with other lines that are more artsy and decorative in nature. The success of this trick is grounded on your imagination and creativity as well as how much you are willing to give up on your car’s more conservative looks for an edgier, hipper, louder, and more contemporary styling.
The hacks we mentioned here are in no way permanent fixes or should be considered as better than conventional deep scratch removal techniques. The point is that they will offer you a temporary solution to get rid of deep scratches on your car. It also underscores the fact that there really aren’t any hacks or shortcuts for the effective removal of deep scratches. Hacks offer you instant success but they don’t last long. The only way you’ll effectively get rid of that deep scratch on your car is by doing the old but proven method of meticulous cleaning, sanding, spraying, clear coat application, polishing, and waxing done over a period of a couple of days and not just hours.
Name*E-Mail*This site uses Akismet to reduce spam. Learn how your comment data is processed.The Best Car Scratch Removers (Review & Buying Guide) in 2020The Best Pressure Washer for Car Cleaning (Review & Buying Guide) in 2020The Best Leather Conditioners and Cleaners (Review & Buying Guide) in 2020The Best Carnauba Wax For Car Care (Review & Buying Guide) in 2020The Best Wax for Black Cars (Review and Buying Guide) in 2020The Best Car Waxes (Review & Buying Guide) in 2020Help us to show youproducts you will loveKitchenistic helps you find the latest and gratestproducts! We curate, you discover!Create AccountUse your e-mail to create a new account.Username or Email AddressPlease Rate This ArticleRate this post, please!

how to fix car scratches
how to fix car scratches yourself
how to fix car scratches at home
how to fix car scratches diy
how to fix car scratches paint
how to fix car scratches with touch up paint
how to fix car scratches with toothpaste
how to fix car scratches on bumper
how to fix car scratches and dents
how to fix car scratches down to metal
how are you in spanish,how are you,how are you in french,how are you doing,how are babies made,how are you in italian,how accurate is credit karma,how are hurricanes named,how are sedimentary rocks formed,how are they doing the vmas,to all the boys,to all the boys i loved before 3,to all the boys i've loved before,to all the boys i loved before,to all the boys i loved before 2,to and from,to a t,to and too,to all the boys i loved before cast,to all the boys 3,fix a flat,fix a flat near me,fix apple watch screen,fix a flat tire,fix a dent,fix and flip loans,fix a floor,fix air conditioner,fix and flip,fix ac in car,car auctions,car accident,car and driver,car accessories,car audio near me,car audio new jersey,car audio nyc,car audio,car auctions near me,car accident today,scratches appearing out nowhere,scratches and changes,scratches and nicks,scratches all down my back,scratches all over body,scratches and dents,scratches and changes saratoga,scratches at belmont,scratches at a level 6,scrapes and bruises
Komentar
Posting Komentar